Many people search for How to Splice 8 Strand Mooring Rope or 8 strand mooring rope splicing instructions step by step. If you are into boating or working on the water, you know that a secure mooring rope is a must-have. It ensures your vessel stays put, even in rough conditions. But when your rope starts to wear out or you need to add a loop or an eye, splicing is the solution. In this blog post, we will dive into everything you need to know about how to splice 8 strand mooring rope. We will provide you with clear, easy-to-follow instructions, tips, and common mistakes to avoid. Whether you are a beginner or an experienced sailor, this guide “How to Splice 8 Strand Mooring Rope” is designed to help you master the art of rope splicing.
Table of Contents
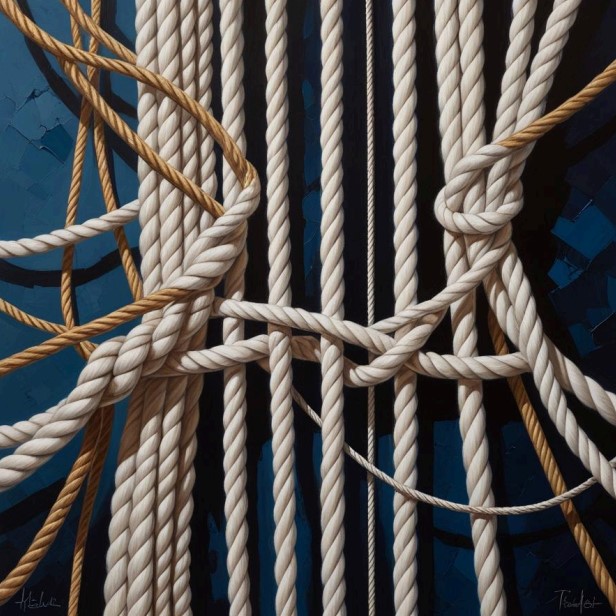
What is 8 Strand Mooring Rope?
Before we get into the nitty-gritty of how to splice 8 strand mooring rope, let’s first understand what it is.
8-strand mooring rope is a type of high-strength rope made up of eight individual strands twisted together. These ropes are popular in marine environments due to their durability, resistance to abrasion, and ability to handle heavy loads. The eight strands typically form a braided pattern, which makes the rope more flexible and easier to handle than traditional 3 strand ropes. They are often used for mooring, anchoring, and towing applications on larger vessels.
Unlike simple ropes, 8-strand ropes require special care when making splices, as the strands can easily fray or come apart if not handled properly.
Why Splice 8 Strand Mooring Rope?
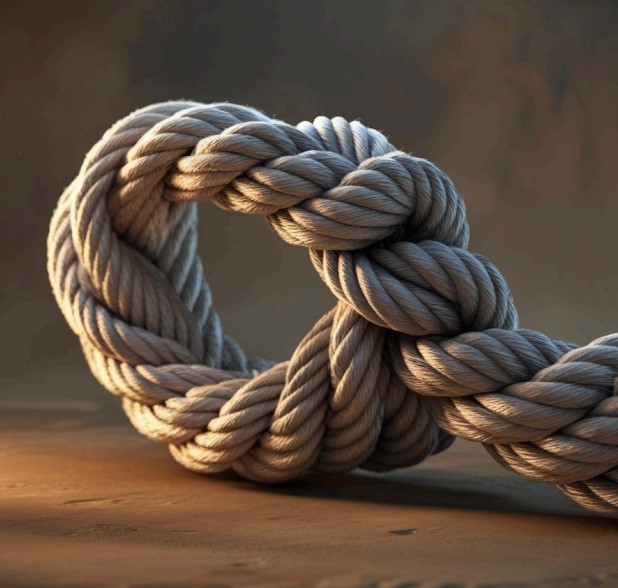
Splicing is a technique used to join two ends of a rope or create loops for anchoring. The reason splicing is preferred over knots is because it does not weaken the rope as much. Knots can reduce the strength of the rope by up to 50%, but a well-spliced rope retains almost its full strength. Whether you are repairing an old rope or creating custom loops or eyes, splicing is a valuable skill for anyone dealing with mooring ropes.
Now, let’s break down the step-by-step instructions for splicing 8 strand mooring rope.
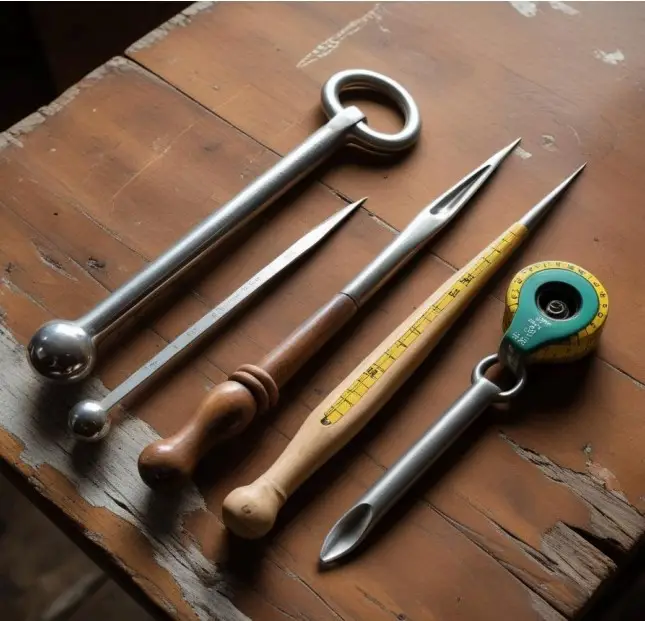
Tools You will Need
Before we get into: How to Splice 8 Strand Mooring Rope, gather the following tools:
- Splicing Fid: This is a long, pointed tool used to help weave strands through the rope.
- Marlinspike or Splicing Needles: These are smaller tools that can help separate and tuck the strands.
- Tape Measure: For measuring the rope and determining the length of the splice.
- Knife or Scissors: To trim any excess rope after splicing.
- Whipping Twine (optional): Used for securing the ends of the rope after splicing.
Step-by-Step Guide: How to Splice 8 Strand Mooring Rope
1. Preparation: Measure and Cut
Before you start splicing, measure the length of rope you will be working with. If you are creating an eye splice (which forms a loop at the end of the rope), you will need to measure out enough rope to accommodate the splice. A good rule of thumb is to allow 3-4 times the diameter of the rope for the length of the splice.
Once you have measured the rope, cut the ends to make them clean and even. Use tape to secure the ends so they do not unravel before you start the splice.
2. Lay Out the Rope
Place the rope flat on a work surface with the strands separated. You will see the eight strands divided into four pairs, each one twisted in a specific direction. Make sure the rope is oriented with the strands facing outward so you can clearly identify the working strands.
3. Unravel the Ends
For a proper splice, you will need to unravel the rope ends. Start by carefully pulling apart the individual strands of the rope for about 10-12 inches. This will give you enough loose strand material to work with.
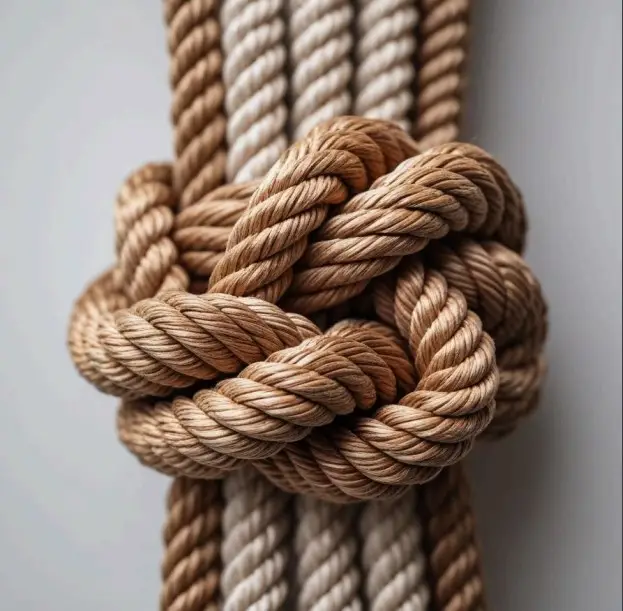
4. Tuck the Strands into the Rope
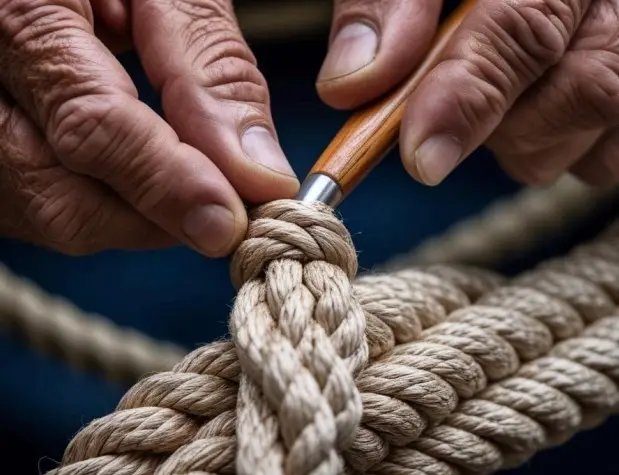
Here comes the tricky part! To splice the rope, you will need to take the individual strands from the end and weave them through the body of the rope. This is where your fid comes in.
- Begin by inserting the fid into the center of the rope, between the strands.
- Pull the working strand through the rope, gently tucking it between the strands, one by one.
- Repeat this process with each strand, working your way around the rope. Each strand should be tucked into the rope for about 3-4 full turns to ensure a tight and secure splice.
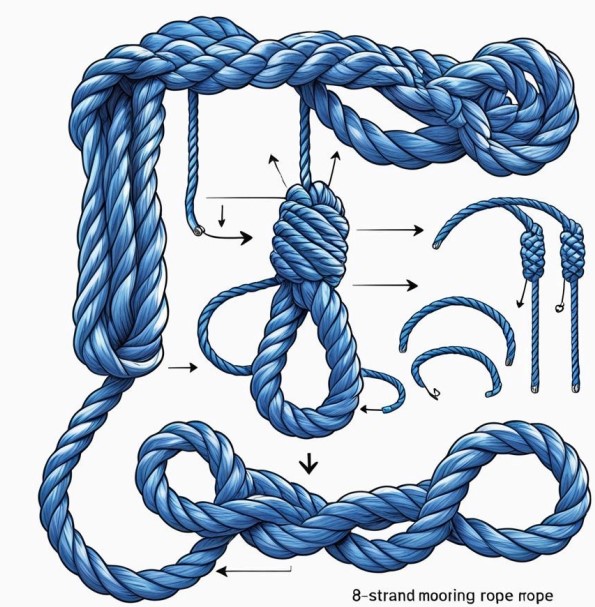
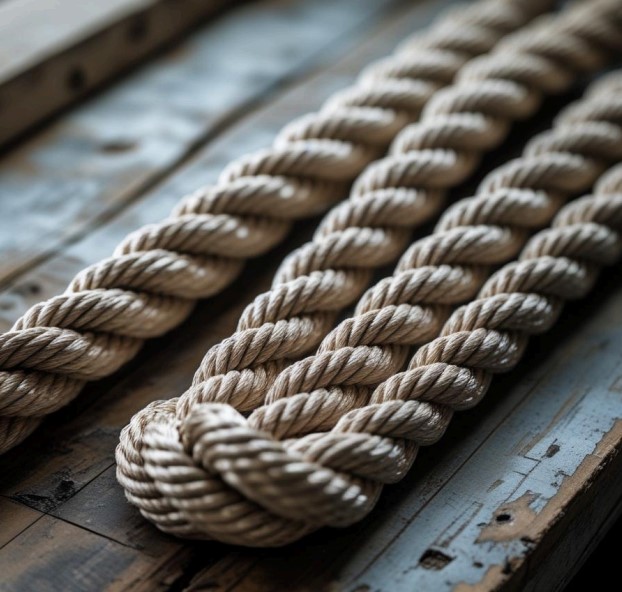
5. Adjust the Strands and Tighten
Once all strands are tucked in, adjust them evenly to make sure the splice looks neat and tight. Use the fid to pull any slack out of the rope, ensuring that the splice is snug and uniform.
6. Secure the Ends
Once the splice is complete, you will need to secure the loose ends of the rope. To do this, you can either use a marlinspike to tuck the last few strands deeper into the splice or simply whip the ends with whipping twine. This helps prevent the rope from unravelling over time.
Also Read: What Is A Mooring Rope | What Are They Used For (Pros & Cons)?
Common Mistakes to Avoid When Splicing 8 Strand Mooring Rope
While splicing is a great way to strengthen your mooring rope, it is important to be mindful of a few common mistakes that could weaken the rope or cause the splice to fail:
- Not Tucking Strands Properly: Each strand needs to be tucked neatly and securely into the rope. Skipping this step can cause the splice to come undone under tension.
- Using Too Much Force: When pulling the strands tight, be careful not to pull too hard and distort the rope. Over-tightening can cause the strands to break.
- Improper Measurements: Ensure you have enough rope to accommodate the splice. Too little rope can lead to a weak splice, while too much rope can make the splice bulky and harder to handle.
Tips for a Stronger, More Secure Splice
- Use the Right Tools: Having the right splicing tools, such as a fid and marlinspike, will make the process much easier and more efficient.
- Practice on Scrap Rope: If you are new to splicing, practice on a piece of scrap rope first. This will help you get the technique down before working on your actual mooring rope.
- Double Check Your Work: Always double-check that all strands are properly tucked and secure before finishing the splice.
Conclusion: Mastering the Art of Splicing 8 Strand Mooring Rope
Splicing 8 strand mooring rope might seem complicated at first, but with a little practice, it becomes second nature. By following the steps outlined in this guide, you can create strong, durable splices that will keep your mooring ropes in top condition. Whether you are replacing a worn-out section of rope or adding a custom loop, splicing is a valuable skill for anyone working with marine equipment. Remember, the key is patience and precision. Take your time, and soon you will be splicing like a pro, than you do not have to ask anyone about “How to splice 8 strand mooring rope” 😉
Happy sailing, and safe mooring!
FAQS
How do you connect an 8 strand rope?
Unlaying the strands at the ends of the rope.
Tucking the strands into the opposite strands to form a strong, secure connection.
Whipping or using a protective cover to prevent fraying.
What is splicing of mooring ropes?
Splicing of mooring ropes is the process of interweaving the rope’s strands at the ends to create a strong, seamless connection. It is used to join two ropes together or to form loops, reducing the risk of the rope fraying or weakening. Splicing helps maintain the rope’s strength and flexibility.
What is an 8 strand plaited rope?
An 8-strand plaited rope is a type of rope made by braiding eight individual strands of fiber together. This design provides strength, durability, and flexibility, making it ideal for heavy-duty applications like mooring or towing. The plaited construction also reduces the rope’s tendency to kink or twist.
What damages mooring ropes?
Abrasion – Friction from rubbing against rough surfaces, like docks or rocks.
UV Exposure – Prolonged sun exposure weakens the rope fibers.
Chafing – Repeated rubbing against other ropes or objects.
Chemical Exposure – Contact with oils, fuels, or harsh cleaning agents.
Improper Storage – Storing ropes in damp, hot, or poorly ventilated areas can cause degradation.
Heavy Loads or Shocks – Excessive strain can weaken the rope over time.
What is the best knot to connect two ropes together?
The best knot to connect two ropes together is the sheet bend. It is strong, easy to tie, and works well with ropes of different thicknesses. For added security, you can double the sheet bend, which makes it even stronger.


One Comment